Intro
I want to do a quick breakdown of what I have been working on in Unity3D recently. Here’s the problem:
How would I simulate a high fidelity piece of clothing efficiently? One with lots of surface detail and needs to maintain its volume?
A hard problem for sure. After a long while of searching and experimenting with different techniques, I came across an article from Remedy animation programmer Henrik Enqvist.
Our solution to this was to have a low-resolution cloth mesh used for simulating the jacket and then map that to the bones in the skeleton that was used for driving the skinned mesh.
From this article on The Secrets Of Cloth Simulation In Alan Wake by Henrik Enqvist
Here are the examples Henrik gives of Alan Wake’s jacket:
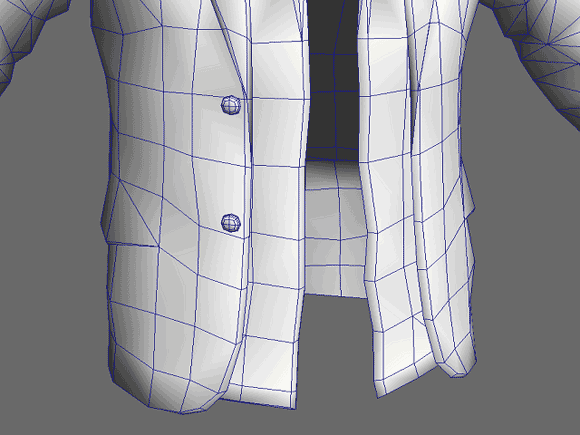
Rigged higher resolution jacket
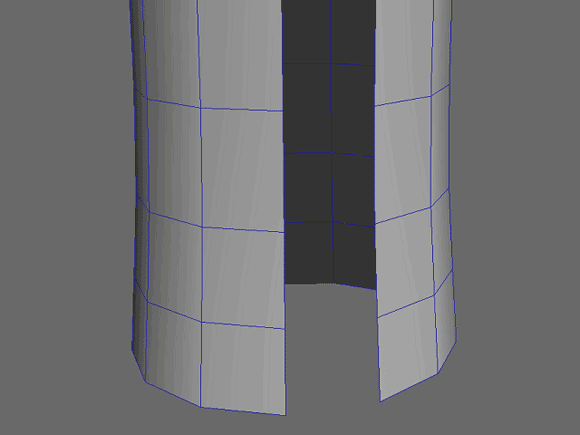
Cloth simulated lower resolution jacket
Doing this in Unity
To do this, I needed my own rigged high res model and a lower res model to work with.
Like so:
Rigged high resolution mesh courtesy of my friend Larry Smith
My lower resolution mesh
My first step was applying a Unity Cloth component to the low res mesh with pretty much the default values.
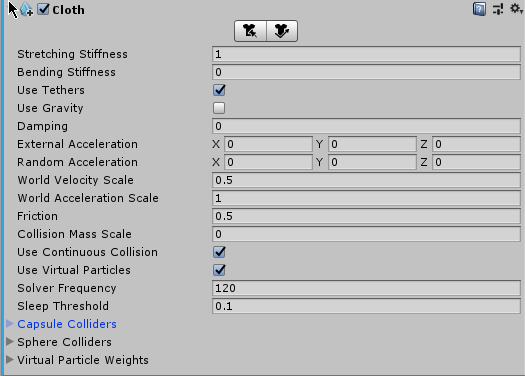
Gravity is set to 0 to let the cloth flow behind the character.
Next up is checking out how the cloth moves in Unity. `
Let’s then check out the skeleton of the higher resolution mesh.
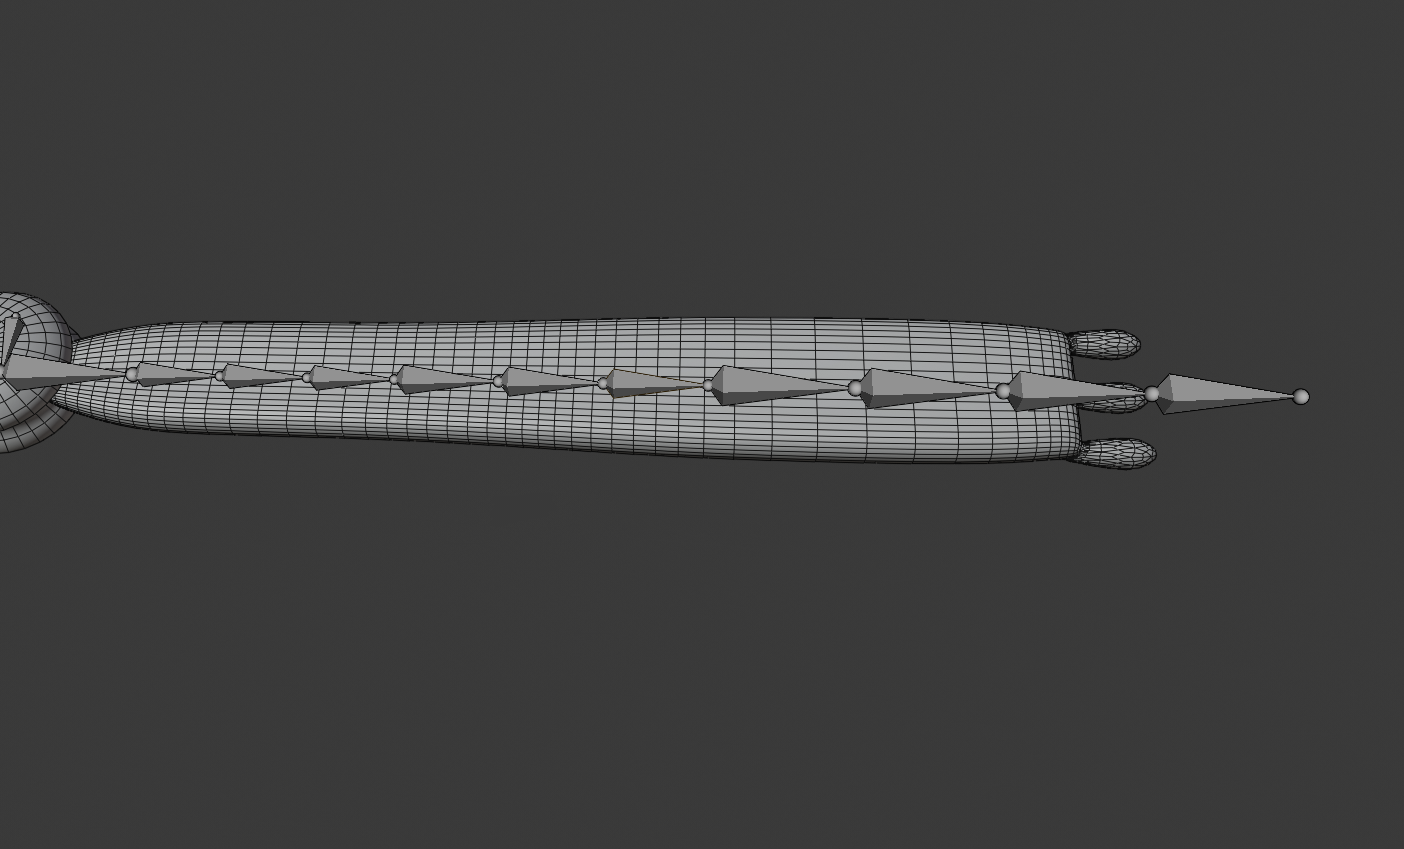
Our goal here is to match the position of each of these bones to a vertex on the low resolution mesh. This way, the higher resolution mesh will appear to be simulated, but we hopefully get close to the performance cost of a normal animation.
To find which vertices I wanted to choose for each bone, I used OnDrawGizmos() to draw spheres at the vertices of the low res mesh.
Here is what I did:
void OnDrawGizmos()
{
    for(int i = 0; i < cloth.vertices.Length; ++i)
    {
        Gizmos.color = Color.red;
        if (i == vertex_number) // vertex_number is a public int variable
            Gizmos.color = Color.blue;
        Gizmos.DrawSphere(transform.TransformPoint(cloth.vertices[i]), 0.07f);
    }
}
I changed vertex_number at runtime to highlight specific vertices.
You can see what this looks like here, where I have set vertex_number to 35 so the sphere on vertex 35 becomes blue.
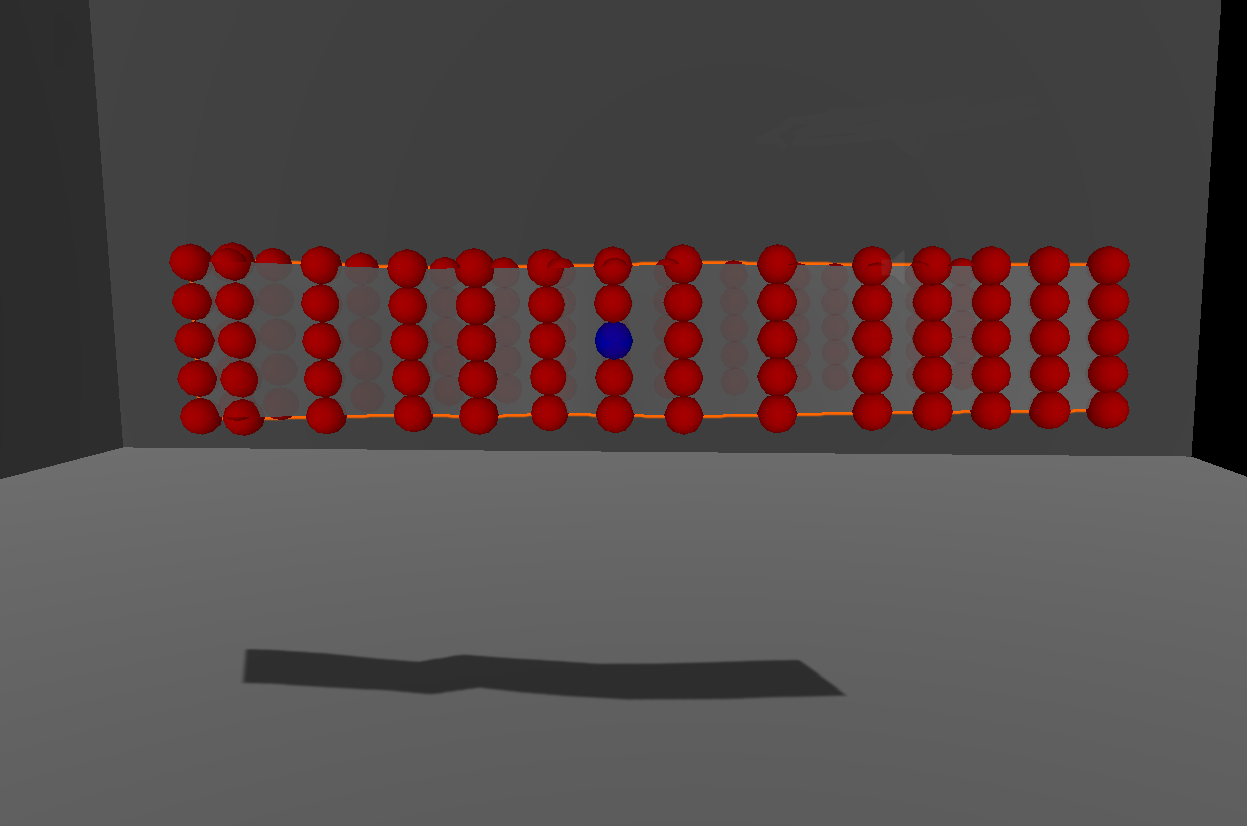
This is the method I use to manually select which vertices on the high res mesh get mapped to the low res mesh.
For each bone of the high res mesh, 8 in total, I find the vertex closest to it along the central axis of the low resolution mesh.
I stored these indices in an array, ordered to match the order of bone hierarchy.
In the end, I have 8 vertices in this array. I did eyeball this for my meshes, but I made sure that the vertices I selected were equidistant and ran the whole length of the low res mesh.
int[] clothIndices = { ... };For the final step in FixedUpdate(), I simply set the locations of the bones to the locations of the vertices, converted to world space.
for(int i = 0; i < clothIndices[i].Length; ++i)
{
    bones[i].position = transform.TransformPoint(cloth.vertices[clothIndices[i]]);
}
What I tried to do next was to turn off the SkinnedMeshRenderer of the low res cloth since I no longer need it to be visible.
The actual result is that the simulation does not run since the Cloth component requires the SkinnedMeshRenderer.
The solution to this is to set the low res mesh to a completely transparent material.
Result
And that’s it!
Outro
This technique has some broad applications for different types of cloth simulation that I hope to explore in the future. I was really compelled to write on this since I had a hard time finding resources to tackle this specific problem, especially in Unity. So I do hope this of help to you now or in the future.
Thank you for reading!
If you have any questions, do ask! Find me at @MitchJMcClellan